
Manage Your Cryptocurrencies in Ledger Live Portfolio and Assets Guide
Manage Your Cryptocurrencies in Ledger Live with this guide. Learn ledger live portfolio management and crypto dashboard features to secure your assets. Start now.
Why Centralized Exchanges Put Your Coins at Risk
Storing digital money on an exchange platform feels simple. But you do not hold your own private keys. This creates a real security gap. One hack or freeze can lock your funds instantly. Manage Your Cryptocurrencies in Ledger Live a Complete Guide shows you a better path. You gain control over your own finances. Follow this approach to avoid third party risk. ledger live error prevention also starts with proper setup.
The Difference Between Exchange Wallets and Hardware Wallets
Exchange wallets keep keys on their servers. Hardware wallets store keys offline on your device. Offline storage is called cold storage. Cold storage blocks remote attacks. Exchange wallets offer convenience but not ownership. Hardware wallets give you true custody. Your coins stay safe even if the exchange fails. restore ledger live functionality works only with your seed phrase. This means only you can move your assets.
How Ledger Live Bridges Security and Usability
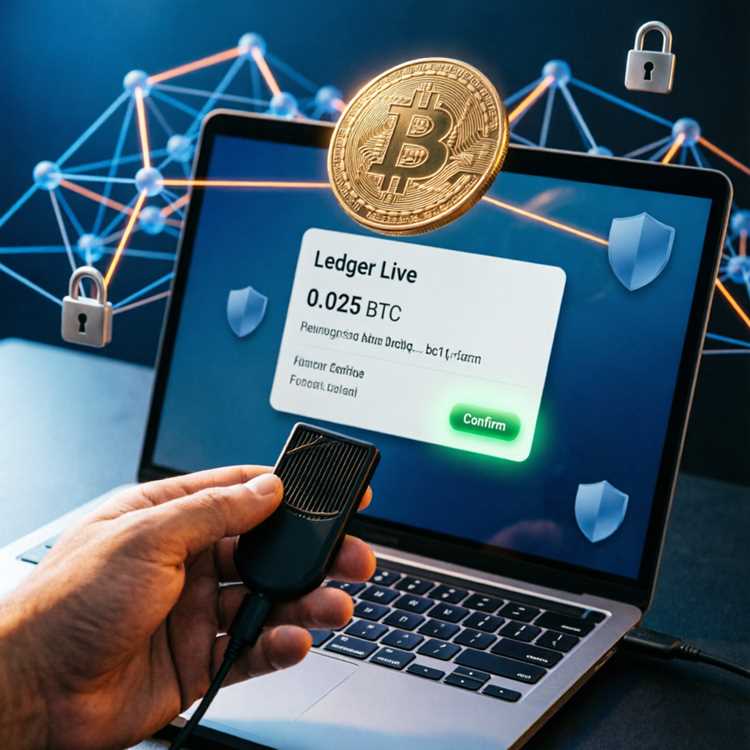
Ledger Live is a desktop and mobile app. It connects your hardware wallet to a user interface. You see balances, send transactions, and manage apps. This is ledger live account management at its core. The app does not store your private keys. Your keys remain on the device itself. Transactions require physical confirmation on the device. This dual layer protects you from malware and phishing.
Why Self Custody Matters for Your Portfolio
Owning your assets means no permission needed for transactions. Centralized platforms can pause withdrawals or freeze accounts. Self custody puts you in full control. Using Ledger Live, you manage crypto ledger live without trusting a third party. Your portfolio stays accessible 24/7. Only you decide when and where to move funds.
Setting Up Ledger Live for First Time Users
Starting your journey requires a few simple steps. First, download the app from the official source. Then, connect your hardware device. The setup process is straightforward for beginners. Let us walk through each stage together.
Downloading the Official Ledger Live App
Visit the official website for the most recent software version. Avoid third-party download sites to prevent tampered files. official ledger live software is available for Windows, macOS, Linux, iOS, and Android. Choose the version that matches your computer or phone. Installation takes less than two minutes. Keep your device connected throughout the process.
Initial Device Configuration and Seed Phrase Backup
After installing the app, set up your hardware wallet. The device will generate a 24 word recovery phrase. Write this phrase down on the provided paper card. Never store it digitally or take a photo. Store the card in a safe place like a fireproof safe. This phrase is your ultimate backup for restore ledger live functionality.
Completing the Ledger Live Windows Setup Process
Windows users may see a driver installation prompt. Allow the system to install necessary drivers. Open the app and click “Get Started”. Choose “Initialize a new device” if yours is new. Follow on screen prompts to set a PIN code. Confirm the recovery phrase on the device. Your setup is now complete. ledger live windows setup ends with the dashboard appearing on screen.
Navigating the Ledger Live Crypto Dashboard
The dashboard is your main control center. It displays all your assets in one view. You can see total portfolio value in your chosen currency. Each account shows balance and recent transactions. This is where ledger live account management becomes intuitive.
Understanding Your Portfolio Balance and Performance
Your total balance updates automatically with market prices. The portfolio section shows asset allocation percentages. You can view performance over 24 hours, 7 days, or 1 month. This gives you a clear picture of your holdings. ledger live update ensures price data stays current. No manual refreshing is required.
Tracking Transactions Through the Activity Log
The activity tab lists every transaction chronologically. Each entry shows date, type, amount, and status. You can filter by sent, received, or pending. Click any transaction for full details including confirmations. This log is essential for ledger live coin management. You can verify that every transfer arrived correctly.
Customizing Your Dashboard Layout
Reorder accounts by dragging them in the sidebar. Hide assets you do not want to see. Choose your preferred fiat currency for display. Enable or disable notifications for transactions. The dashboard adapts to your personal workflow. This makes manage crypto ledger live feel tailored to you.
Managing Assets with the Ledger Live Assets List
Every supported cryptocurrency appears in the assets list. Check the list before buying new coins. Not all tokens are supported natively. But most major coins and many ERC-20 tokens work. Knowing what is supported helps you plan your portfolio.
Checking the Official Supported Assets List
Open the app and navigate to the manager tab. Search for the coin you want to add. Each coin requires a specific app installation on your device. ledger live assets list updates regularly with new additions. Bitcoin, Ethereum, Solana, and Polygon are available. Stablecoins like USDC and USDT also work fine.
Installing Blockchain Apps on Your Ledger Device
Go to the manager tab in Ledger Live. Connect your device and unlock it. Find the app for your desired coin. Click install and wait for the process to finish. Device storage limits how many apps you can install. Nano S holds about 3-6 apps. Nano X holds up to 100 apps. Manage crypto ledger live by choosing your most used coins first.
Using the Account Management Feature for Multiple Wallets
You can create multiple accounts for the same coin. For example, have separate Bitcoin accounts for savings and spending. Each account has its own receive address. Label each account for easy identification. ledger live account management supports renaming, reordering, and hiding accounts. This keeps your portfolio organized even with many assets.
Sending and Receiving Cryptocurrencies with Ledger Live
Transferring funds is simple but requires careful steps. Sending requires physical confirmation on the device. Receiving only requires sharing your public address. Both operations update your portfolio automatically. This is a core part of ledger live crypto management.
Generating a Receive Address for Incoming Funds
Click the receive button next to the asset you want. The app shows a fresh receive address on screen. Verify this address on your hardware device display. Compare both addresses character by character. Only approve if they match exactly. Share this address with the sender. Never reuse addresses for privacy reasons.
How to Send Ethereum and Other Coins
Click send and enter the recipient address. Double check the address before proceeding. Enter the amount or choose “max” to send all. Review the network fee shown on screen. Confirm the transaction on your hardware device. The app will show progress until confirmed. send ethereum ledger live follows the same flow as Bitcoin. The process is identical for most assets.
Transaction Fees and Confirmation Times
Network fees vary by blockchain congestion. Ledger Live shows slow, medium, and fast fee options. Choose slow for lower fees and longer wait times. Choose fast for quicker confirmation during congestion. Bitcoin confirms in 10-60 minutes typically. Ethereum confirms in 1-5 minutes usually. Monitor the ledger live token management dashboard for pending transactions.
Swapping and Exchanging Tokens Inside Ledger Live
Built in swapping features let you exchange one asset for another. You do not need to use a separate exchange. Swap partners provide liquidity and rates. This feature supports many trading pairs. It simplifies ledger live crypto management by keeping everything in one app.
Supported Pairs and Liquidity Providers
Ledger Live partners with several swap providers. ChangeNow, Paraswap, and 1inch are common options. Each provider supports different trading pairs. Major pairs like BTC to ETH are widely available. Altcoin pairs may have limited options. Check the swap section in the app for current offerings.
Fees and Minimum Swap Amounts
Each provider charges a service fee. The fee appears before you confirm the swap. Minimum swap amounts apply to all transactions. Small swaps may not be cost effective due to minimums. Compare rates from different providers inside the app. Choose the best rate for your needs.
Comparing Swap Rates Across Providers
Ledger Live shows quotes from multiple providers. You can see the final amount you will receive. Select the provider with the best rate. Confirm the swap on your hardware device. The exchange happens directly from your wallet. This avoids depositing funds on a centralized exchange. Manage crypto ledger live with trust and transparency.
Managing DeFi and Web3 Tokens on Ledger Live
Decentralized finance tokens require special handling. Many ERC-20 tokens can be added manually. Ledger Live supports token management for Ethereum based assets. You can also interact with dApps using Ledger devices. This opens up lending, staking, and farming opportunities.
Adding Custom ERC-20 Tokens to Your Account
Click add token in your Ethereum account settings. Enter the token contract address. The app will fetch the token name and decimals. Confirm and the token appears in your portfolio. Balances update automatically once added. ledger live token management handles thousands of tokens this way. No need to wait for official listing.
Using Ledger Live for Token Management
View all your tokens under the Ethereum account. Send and receive tokens just like the main coin. Token transactions require ETH for gas fees. Keep a small amount of ETH in your wallet. This covers transaction costs for token transfers. You can also stake certain tokens directly. ledger live staking options are available for some assets.
Interacting with dApps via Ledger
Connect your Ledger device to dApps using WalletConnect. Open a dApp like Uniswap or Aave. Choose WalletConnect as your connection method. Scan the QR code with the Ledger Live mobile app. Approve the connection on your device. Transactions now require hardware confirmation. This keeps your keys offline while using DeFi services.
Backing Up and Restoring Your Ledger Live Setup
Losing access to your wallet is a real fear. Backups solve this problem when done correctly. The recovery phrase is your master key. Keep it safe and offline for emergencies. restore ledger live works perfectly with a correct phrase.
Creating a Backup of Your Recovery Phrase
Write the 24 words on the provided card. Use a pen with permanent ink. Store the card in a fireproof and waterproof safe. Consider a second copy in a different location. Never enter the phrase into any website. Never share the phrase with anyone. This phrase is the only way to restore ledger live on a new device.
How to Restore Ledger Live on a New Computer
Install the app on the new computer. Choose “Restore from recovery phrase” during setup. Enter your 24 word phrase on the device itself. The device will regenerate your private keys. Connect the device to the app. All your accounts will sync automatically. Your portfolio reappears exactly as before.
Syncing with a Second Ledger Device
Some users buy a second device as a backup. Restore the same recovery phrase onto the second device. Both devices will control the same accounts. Keep one device in a safe as an emergency spare. Travel with the other device for on the go access. This provides redundancy without extra complexity.
Ledger Live Accessories and Compatibility
Accessories enhance your hardware wallet experience. Some items improve portability. Others provide replacement parts. The table below shows common accessories with prices and uses.
| Accessory | Price (USD) | Compatibility | Use Case |
|---|---|---|---|
| Ledger Nano S Plus | $79 | Windows, macOS, Linux, iOS, Android | Secure storage for beginners |
| Ledger Nano X | $149 | Windows, macOS, Linux, iOS, Android (Bluetooth) | Mobile first users |
| Ledger Nano S | $59 | Windows, macOS, Linux, iOS, Android | Budget friendly cold storage |
| Ledger Stax | $279 | Windows, macOS, Linux, iOS, Android (Bluetooth, E Ink) | High end security with touchscreen |
| LNX Battery Replacement Kit | $19 | Ledger Nano X | Extend hardware lifespan |
| USB C to USB C Cable | $9 | Ledger Nano X, Stax | Secure connection for desktop |
Benefits of Using Ledger Live for Portfolio Management
Managing multiple coins becomes easier with Ledger Live. The app centralizes all your assets in one place. It removes the need to log into multiple wallets. Here are key advantages of using this platform.
- Offline key storage prevents remote hacking attempts.
- Multi platform support works on desktop and mobile.
- Real time price updates for ledger live portfolio tracking.
- Built in swap and buy features avoid extra apps.
- Account labeling and sorting keeps things organized.
- Transaction history search helps with tax reporting.
- Staking options provide passive income for some coins.
- Regular ledger live update releases add new features.
Step by Step Guide to Add a New Coin to Ledger Live
Adding a new coin takes less than five minutes. Follow these steps to expand your portfolio. Each step builds on the previous one.
- Open Ledger Live and connect your device via USB or Bluetooth.
- Navigate to the manager tab in the left sidebar.
- Search for the coin you want to add using the search bar.
- Click install to load the blockchain app onto your device.
- Return to the portfolio tab and click add account for the new coin.
- Confirm the account creation on your hardware device.
- Your new account now appears in the portfolio list.
Repeat these steps for each additional coin you want to hold. The ledger live assets list grows over time with new blockchain support.
Troubleshooting Common Ledger Live Issues
Problems can occur during setup or regular use. Most issues have simple solutions. Do not panic when something goes wrong. Check these common scenarios before contacting support. ledger live error messages often point to the solution.
Fixing Connection Errors Between Device and App
Ensure your device is unlocked before connecting. Use a different USB cable if connection fails. Restart both the app and the device. For mobile, check that Bluetooth is enabled. Reinstall the app if problems persist. Connection issues are usually cable or permission related.
Resolving Synchronization Problems
Sometimes accounts do not show the correct balance. Force a resync by going to settings. Select the accounts tab and click synchronize. Wait for the process to complete. If balances still look wrong, check the blockchain explorer. The explorer shows the true state of your wallet. ledger live crypto dashboard should match the explorer after syncing.
Steps to Fix a Ledger Live Error During Transactions
Transaction errors often stem from insufficient funds. Check that you have enough for fees. Confirm the recipient address is valid. Update the app to the latest version. Restart the transaction from scratch. If errors continue, contact Ledger support through the app.
Frequently Asked Questions About Managing Assets on Ledger Live
New users often have common questions. Here are clear answers to help you feel confident. These cover security, compatibility, and functionality.
Can I Manage Multiple Currencies in One Place?
Yes, Ledger Live supports over 5,000 coins and tokens. Major blockchains like Bitcoin, Ethereum, Solana, and Polygon work natively. ERC-20 tokens can be added manually. The app acts as a single dashboard for all your holdings. This is the core benefit of ledger live crypto management.
Is My Seed Phrase Needed to View My Portfolio?
No, you never enter the seed phrase into the app. The phrase stays on your hardware device only. The app reads public addresses and balances without the phrase. Your seed phrase remains offline and protected. Never type it into any website or app.
What Happens to My Coins if Ledger Stops Providing Services?

Your coins are stored on the blockchain, not on Ledger servers. Ledger Live is just an interface. If the company stops operations, you can use other wallets. Your recovery phrase works with any compatible wallet software. Your funds remain safe and accessible permanently.
How Often Should I Update Ledger Live?
Enable automatic updates in the app settings. Check for new versions manually each month. Firmware updates for the device are equally important. Always install updates quickly after release. This ensures you have the latest security patches. ledger live update notifications appear in the app when new versions are available.
Managing digital assets requires knowledge and the right tools. Ledger Live provides both security and convenience. Self custody puts you in charge of your financial future. Start with small amounts until you feel comfortable. Explore each feature at your own pace. Your portfolio stays secure with every transaction verified on the device. Take control today and enjoy the freedom of true ownership.